BIAPPS 11.8 installation[installing OBIEE 11.1.1.7]
INSTALL AND CONFIGURE OBIEE [11.1.1.7.0]
Bi apps installation Part 2 In the first part we had installed the data ware house database and ruc for the OBIEE in this second part we need install and configure the OBIEE 11.1.1.7
Step 1
Unzip the OBEE11g software's and create the staging directory for installation
V37449-01_2of2.zip
V37450-01_2of2.zip
V37449-01_1of2.zip
V37450-01_1of2.zip
V37451-01.zip
once you unzip all the software Binaries it will create the bishiphome[staging directory of the bi binaries]
Start the Bi installer by using the runInstaller in the bishiphome
Step 2
Step 3
Choose the Enterprise Install [install the binaries and configure the domain for BI]
If we choose the software Only install then we need to run the config.sh command after the software installation completes for configuring the weblogic Domain for BI
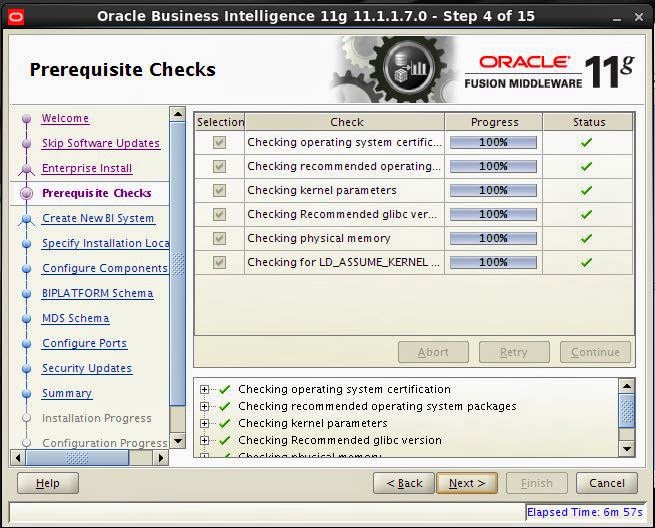
Step 4
Step 5
Provide the Weblogic details for the New BI Domain
username :weblogic_superuser
Password: super user password for the weblogic
Domain :Provide the Domain Name for the Bi [default bi foundation_domain]
Step 6
Provide the installation location and the directory structure for the different artifacts of the BI
Oracle Middle ware Home Location :[The Location of the oracle middle ware home]
Oracle Home Directory Oracle_BI1[The Bi oracle Home directory which will be inside the middle ware home] we need to Specify the directory name of the oracle home no need to specify the full path
Weblogic_server_Directory :Middle ware_home/wlserver_10.3[oralce weblogic server binaries will be installed in this location]
Domain Home Location :Middle ware Home/user_projects/domain_name[The BI DOmain components will be installed in this location ]
Oracle Instance Location :Middle ware_home/instances[all the services which are c artifacts [opmn controlled process rather in the weblogic are installed in this location] once you specify the instance name then all the binaries for the instance will be under the location mw_home/instances/<instance_name>
Instance_name :Name of the instance [this instance will be create under the mw_home/instances
Step 7
Select the Necessary components For the BI in the new edition Essbase suite had been introduced
Step 8
Provide the Details of the Data ware house database where the BI RCU had been run
Connect String :database_hostname:db:port:db_service_name
BIPlatform schemaa_Username :DEV_BIPLATFORM[when we are creating the rcu it will create user as prefix_BIPLATFORM[prefix is which we mentioned in the rcu creation stage for prefixing the user schema's]
BIPlatform_schema_password: password for the DEV_BIPLATFORM schema
Step 9
Provide the MDS[metadata service] schema details
Connect String :db_hostname:dbport:dbservice_name
MDS_schema_Username :DEV_MDS[prefix may change according to the prefix given during the ruc] we need to provide the schema name Ending with MDS
MDS_schema_password :Password for the MDS schema
Specify the list of Port's which will be used by the BI ..
when you select the Auto port then it will install with the default Ports
when you want to used the custom ports for the bi components then create the file staticports.ini [sample staticports.init fill is located in
[orabi@biapp Response]$ pwd
/home/orabi/bishiphome/Disk1/stage/Response
[orabi@biapp Response]$ cat staticports.ini
# Note that if ports are not defined in this file they will be autoallocated starting at port 9500
# It is recommended that ports 9500-9520 are left unassigned for this auto-allocation
[WEBLOGIC]
#The Domain port no. This is the listen port of Weblogic Adminserver for the domain.
#Domain Port No = 7001
#The "content" port for the BIEE apps. This is the Weblogic Managed Server port on which BIEE applications are deployed.
#Oracle WLS BIEE Managed Server Port No = 9704
#The SSL port for the Weblogic Managed Server
#Oracle WLS BIEE Managed Server SSL Port No = 9804
#The Weblogic node manager port
#Node Manager Port No = 9556
[OPMN]
#Process Manager Local port no
#Oracle Process Manager Local Port No = 6700
#Process Manager Remote port no
#Oracle Process Manager Remote Port No = 6701
#Process Manager Request port no
#Oracle Process Manager Request Port No = 6702
[BIFOUNDATION]
#The listen port for OracleBIServer component
#Oracle BI Server Port No = 9703
#The monitor port for OracleBIServer component
#Oracle BI Server Monitor Port No = 9701
#The listen port for OracleBIPresentationServices component
#Oracle BI Presentation Services Port No = 9710
#The listen port for OracleBIScheduler component
#Oracle BI Scheduler Port No = 9705
#The monitor port for OracleBIScheduler component
#Oracle BI Scheduler Monitor Port No = 9708
#The script RPC port for OracleBIScheduler component
#Oracle BI Scheduler Script RPC Port No = 9707
#The listen port for OracleBIClusterController component
#Oracle BI ClusterController Port No = 9706
#The monitor port for OracleBIClusterController component
#Oracle BI ClusterController Monitor Port No = 9700
#The listen port for OracleBIJavaHost component
#Oracle BI JavaHost Port No = 9810
[ESSBASE]
#The listen port for Essbase Agent
#Essbase Agent Port No = 1423
#The listen port for Essbase Studio
#Essbase Studio Port No = 5300
You can Change the Ports in the file and Specify the custom ports but when you provide the custom ports provide a port series for each component[in default port allocation 9000 is used for BIfoundation Domain,opmn componets has 6000 serious port number's]
Step 11
Metalink Support details
Step 12
check the summary before start the installation
Step 13
Start the installation Process
Step 14
After the installation Process Completed the configuration process will stat and competes the configuration of all the components
Step 15
Save the Configuration File nd click finish to finish the installaton
Check the weblogic console and opmn process once the instillation is completed all the process will be up and running
/u02/app/oracle/fmw/instances/instance1/bin
[orabi@biapp bin]$ ./opmnctl status -l
Processes in Instance: instance1
---------------------------------+--------------------+---------+----------+------------+----------+-----------+------
ias-component | process-type | pid | status | uid | memused | uptime | ports
---------------------------------+--------------------+---------+----------+------------+----------+-----------+------
essbasestudio1 | EssbaseStudio | 23772 | Alive | 1960332751 | 6123440 | 6:38:46 | N/A
essbaseserver1 | Essbase | 23711 | Alive | 1960332750 | 3690748 | 6:39:05 | N/A
coreapplication_obiccs1 | OracleBIClusterCo~ | 23430 | Alive | 1960332745 | 1513436 | 6:39:30 | N/A
coreapplication_obisch1 | OracleBIScheduler~ | 23670 | Alive | 1960332749 | 1951504 | 6:39:11 | N/A
coreapplication_obijh1 | OracleBIJavaHostC~ | 23630 | Alive | 1960332748 | 4208388 | 6:39:15 | javahost:9810
coreapplication_obips1 | OracleBIPresentat~ | 23571 | Alive | 1960332747 | 5336092 | 6:39:22 | N/A
coreapplication_obis1 | OracleBIServerCom~ | 23460 | Alive | 1960332746 | 7783136 | 6:39:29 | N/A
Once the BI instillation Completes we Need to upgrade the weblogic 10.5 to 10.6 as we need to install the ODI .. In the same weblogic Domain
We need to Extend the web logic Domain for installing the ODI as ODI is compatible with the 10.6 version we need to upgrade to 10.6
UPGRADE WEBLOGIC 10.5 TO 10.6
Step 1
Stop all the service's running in the Domain .. opmnctl and weblogic managed and admin server
Download the Patch Patch 13529623: PLACEHOLDER BUG FOR WEBLOGIC SERVER 11GR1 (10.3.6) UPGRADE INSTALLER
and extract the patch to get get the wls installer which will upgrade the 10.5 to 10.6
Use the java from the BI home and execute the jar installer
Step 2
click next to proceed to the next step
Step 3
Select the use existing middle ware home [this is the mw_home which is going to be upgraded]
Step 4
Metalink details
Step 5
Choose the product components which is need to be upgraded [in our env we need to upgrade all the products so leave as the default one]
Step 6
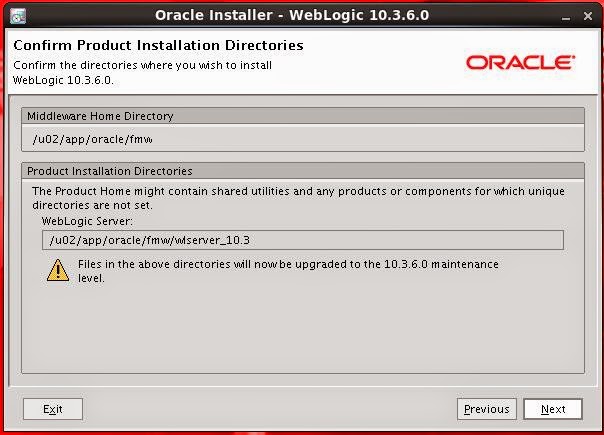
Make sure about the wls_home which is going to be upgraded
Step 7
Click Done to finish the instalaltin
Note:= check the part three for creating the RCU for ODI and BIAPPS


No comments:
Post a Comment