Showing posts with label OBEE11g. Show all posts

Sunday, July 13, 2014

ODI and BIAPPS Installation for BIAPPS 11.8


ORACLE DATA INTEGRATOR AND BI APPLICATIONS[11.8] INSTALLATION [part 4] 


In This practice [part 4] we go through the  steps for installing the ODI and BIAPPS binaries and once we apply the required patches we will go through the configuration steps in next part

Step 1
When you start the Installer the installer will Prompt  for the jdk location we need to specify the jdk location of the BI
Start the Installer an click the next page to Proceed

Step 2 Software updates 

Skip software Updates and Proceed for Next Page

Step 3 selecting the install products 
Select the Product for the installation
 we need to select the ODI studio,ODI SDK ,java EE Installation Java EE Agent,ODI console,Public Web service

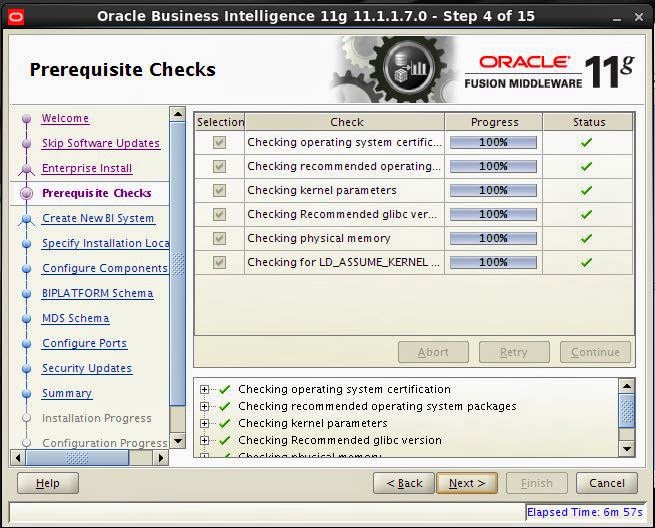
Step 4 Prerequisite checking

Once all the Prerequisite's are completed then go with the next step

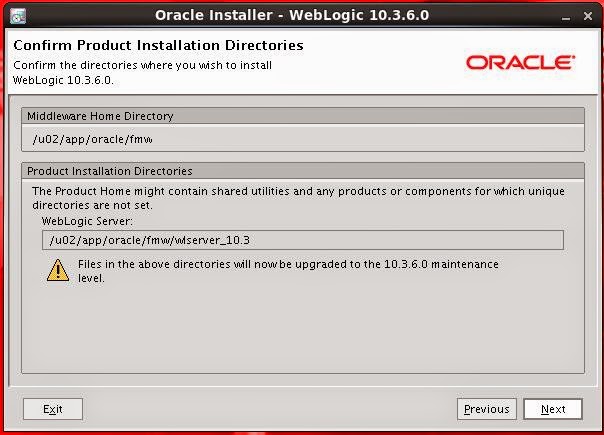
Step 5 MW_HOME Selection

Oracle Middle ware Home := provide the existing oracle MW_Home which is used for the BI installation
Oracle Home Directory      :=Oracle_OID1[it will be create in the MW_HOME]

Step 6 Choosing the application server

ODI can be installed in web logic or WebSphere since we had installed the BI on weblogic we need to install the ODI in the weblogic as we are going to extend the existing domain for ODI


Step 7 repository configuration 

Skip the ODI configuration we can configure after all the Patches had been applied


Step 8 installation summary 
Check the Installation Summary

Step 10 Configure Progress

Once the Installation process completes and  the configuration process starts..
The configuration Process Finishes successfully then we can go the next Page

Step 11 Install complete 

Save the config file for further reference and finish to complete the installation


INSTALLING BIAPPS 11.8

Download the BI Apps binaries from the oracle site and unzip in the temporary folder and Navigate to Disk1 and start the runinstaller 

Step 1
Run the installer and provide the jdk location  when it is asked 


Step 2 click next to proceed with the installation 


Step 3 Prerequisite checks 

Once all the requisite checks had been successful then proceed to next step


Step 4 MW_HOME and ORACLE_HOME location

Oracle Middle ware Home := [Provide the Middle ware Home Location where the BI Had been installed]
Oracle Home Directory      :=Provide the BI[OBIEE] oracle home


Step 5:=Check the summary page

check the summary page and save the summary file for further reference


Step 6 Installation IN Progress

Once the installation completes click next to proceed


Step 6

Save the Repository file for further reference and click finish


APPLYING PATCHES FUSION MIDDLE WARE ARTIFACTS FOR BIAPPS 11.8


Step 1
unzip all the patches in the directory and modify the  apply_patches_import.txt  file with the necessary changes MW_HOME/Oracle_BI1/biapps/tools/bin/

[orabi@biapp bin]$ cat /u02/app/oracle/fmw/Oracle_BI1/biapps/tools/bin/apply_patches_import.txt
# Required JAVA_HOME - Java home
JAVA_HOME=/u02/app/oracle/fmw/Oracle_BI1/jdk
# Required INVENTORY_LOC - Inventory Location
INVENTORY_LOC=/u01/app/oracle/oraInventory
ORACLE_HOME=/u02/app/oracle/fmw/Oracle_BI1
MW_HOME=/u02/app/oracle/fmw
COMMON_ORACLE_HOME=/u02/app/oracle/fmw/oracle_common
WL_HOME=/u02/app/=oracle/fmw/wlserver_10.3
SOA_HOME=
ODI_HOME=/u02/app/oracle/fmw/Oracle_ODI1
SKIP_BITECH_PATCHES=false
WORKDIR=/home/orabi/Patch/log
PATCH_ROOT_DIR=/home/orabi/Patch

Legends
JAVA_HOME:=Provide the value of the OBIEE java Home the java located inside the bi oracle home
INVENTORY_LOC:=Provide the central inventory Location 
ORACLE_HOME:=Provide the Location of the Bi oracle Home
MW_HOME:=Provide the Location of the Middle ware Home 
COMMON_ORACLE_HOME:=Provide the location of oracle_common directory which resides in MW_HOME
WL_HOME:=Provide the Location of the Weblogic Home
ODI_HOME:=Provide the Location of the ODI home
WORKDIR:=Create the Directory with read and write permission for the BI /Os user to create the log file
PATCH_ROOT_DIR:=Directory where the patch are  unzipped 

Step 2
Run the APPLY_PATCHES.pl  from the MW_HOME/Oracle_BI1/biapps/tools/bin with the
MW_HOME/Oracle_BI1/biapps/tools/bin/apply_patches_import.txt

[orabi@biapp bin]$ perl /u02/app/oracle/fmw/Oracle_BI1/biapps/tools/bin/APPLY_PATCHES.pl /u02/app/oracle/fmw/Oracle_BI1/biapps/tools/bin/apply_patches_import.txt


----------START OF PATCHING REPORT------------------

Current PLATFORM Detected :linuxx8664

* BIAPPSSHIPHOME Patching Report ..........
Patch Succeded: fsmlitedb_rel8pmlr2_17937188.zip
Patch Succeded: p17463314_111170_Generic.zip
Patch Succeded: fsmlite_rel8pmlr2_18529692.zip
Patch Succeded: p16913445_111170_Generic.zip
Patch Succeded: fsclite_rel8pmlr2_17937189.zip
Patch Succeded: p17463403_111170_Generic.zip
Patch Succeded: p17300045_111170_Generic.zip
Patch Succeded: p16997936_111170_Generic.zip
Patch Succeded: atglite_rel8mlr12_17657541.zip
Patch Succeded: atglite_rel8mlr11_database_17533000.zip
Patch Succeded: BIFNDNEPM_11_1_1_7_0OBIEEBP_LINUX_X64_130816_0640_17314326.zip
Patch Succeded: BISERVER_11_1_1_7_0OBIEEBP_LINUX_X64_130919_2217_17463395.zip
Patch Succeded: BIFNDN_11_1_1_7_0OBIEEBP_LINUX_X64_131008_1224_5_17463376.zip
Patch Succeded: p16569379_111170_Linux-x86-64.zip

* Oracle Common Patching Report ..........
Patch Succeded: EM_p14670290_111170_Generic.zip
Patch Succeded: WebCenter_BP8REL8_2_17483105.zip
Patch Succeded: p16433036_111170_Generic.zip
Patch Succeded: JDEVADF_REL8MLR9-RT_17611288.zip
Patch Succeded: idmpatch-1309a-ps6-17440204-urapi.zip
Patch Succeded: fmw_diagnostics_17714493.zip
Patch Succeded: idmpatch-1310a-ps6-17447428-owsmrel8.zip
Patch Succeded: SOACOMMON_REL8B7_17549390.zip
Patch Succeded: J2EE_Patch-3-PS6RC3_bug-17237952.zip
Patch Succeded: Webservices_Patch-2-PS6REL8_bug-17629596.zip
Patch Succeded: p16080773_111170_Generic.zip
Patch Succeded: p16830801_111170_Generic.zip
Patch Succeded: appstrace_17363039.zip
Patch Succeded: T2P_FW_REL8_Patch2_17353546.zip
Patch Succeded: p16433147_111170_Generic.zip
Patch Succeded: idmpatch-1311a-ps6-17665823-opss.zip

* SOA Patching Report ..........
 Not applying SOA Patches since SOA Home (SOA_HOME) value is not specified

* ODI Patching Report ..........
Patch Succeded: p18204886_111170_Generic.zip

* Weblogic Patching Report ..........
Successfully installed Patch ID:  2GH7
Successfully installed Patch ID:  W3Q6
Successfully installed Patch ID:  RJNF
Successfully installed Patch ID:  FKGW
Successfully installed Patch ID:  JEJW
Successfully installed Patch ID:  LJVB
Successfully installed Patch ID:  IHFB
Successfully installed Patch ID:  6AEJ
Successfully installed Patch ID:  EAS7
Successfully installed Patch ID:  TN4A
Successfully installed Patch ID:  KPFJ

----------END OF PATCHING REPORT------------------

This final patching report log file is also located at: /home/orabi/Patch/log/final_patching_report.log


Check the Log files for the Each location
[1]check the  biappshiphome_generic_patches.log and verify Patches had Been applied
Verifying the update...
Patches 16913445,16997936,17300045,17463314,17463403,17533000,17657541,17937188,17937189,18529692 successfully applied.
Log file location: /u02/app/oracle/fmw/Oracle_BI1/cfgtoollogs/opatch/opatch2014-07-13_17-20-50PM_1.log
OPatch succeeded.


[2]Check biappshiphome_linux64_patches.log as we are using the Linux 64x84 

Verifying the update...
Patches 16569379,17314326,17463376,17463395 successfully applied.
Log file location: /u02/app/oracle/fmw/Oracle_BI1/cfgtoollogs/opatch/opatch2014-07-13_17-29-05PM_1.log
OPatch succeeded.

[3] Check the odi_generic_patches.log 
Verifying the update...
Patches 18204886 successfully applied.
Log file location: /u02/app/oracle/fmw/Oracle_ODI1/cfgtoollogs/opatch/opatch2014-07-13_17-40-39PM_1.log
OPatch succeeded.

[4]Check the oracle_common_generic_patches.log
Verifying the update...
Patches 14670290,16080773,16433036,16433147,16830801,17237952,17353546,17363039,17440204,17447428,17483105,17549390,17611288,17629596,17665823,17714493 successfully applied.
Log file location: /u02/app/oracle/fmw/oracle_common/cfgtoollogs/opatch/opatch2014-07-13_17-37-25PM_1.log
OPatch succeeded.

[5] cat weblogic_patching.log
Identifying patches that may be installed ...
Installable patches:[2GH7, RJNF, FKGW, JEJW, LJVB, IHFB, 6AEJ, EAS7, W3Q6, TN4A, KPFJ]
Identifying patches that may be removed ...
Remove candidates: [GFWZ, ITL9, P9A6, H2FT, 6D9T, TWDG, GVYL, 7AAZ, 9BPB, LYRQ, SRUM, TZFH, TL3Y, 99BQ, LWLH, HYKC, Z8MQ, 91SX, A1DL, S39F, I3HZ, AW1V, 3DM4, 81X7, 4GG5, 3BBT, 7YZB, IUZI, 7BG3, 956R, 9887, S76X, 6X2J, 4GPI, GKQW, 6V9V, IH4D, QKPF, HS7H, XA6W, 8JYQ, U1RB, 2277, ZR38, 27QC, S4BN, 81QF, YJI2, EUW3, 7YU1, YHFH, RFP7, 16ZR, 61K2, 9T2G, ZPB8, 1IHE, WYRU, ALFS, CHEE, JG58, 56MM, HW5A, SFAZ, GP9A, F89C, G72F, EG2S, FL81, SZXM, QEUF, ANVN, KIGI, 1PI6, RNQP, BS5P, W4F6, CM69, Q1UZ, UDN7, F6G7, 7WVY, JZED, E9FL, RPI1, 9264, SKLY, B8V1, 9I9D, MYFD, F31P, BCSD, XLVS, FFRX, BADF, K1J3, 2NUX, RIPQ, CLLX, 1NRR, XIJ8, QK63, JLJ6, RUNT, AI76, 4SYF, V41Y, XLUK, YJTB, 72TK, MB4Y, Z4W7, EF1X, BEJG, BJY4, 879N, 546H]
Removable patches:[]
Installing patches ...
Patches to be installed in following order: [2GH7, W3Q6, RJNF, FKGW, JEJW, LJVB, IHFB, 6AEJ, EAS7, TN4A, KPFJ]

Installing patch: KPFJ
Sun Jul 13 18:06:11 GST 2014: Executing command:
  /u02/app/oracle/fmw/Oracle_BI1/jdk/jre/bin/java
  -Duser.country=US
  -Duser.language=en
  -jar
  /u02/app/oracle/fmw/utils/bsu/patch-client.jar
  -prod_dir=/u02/app/oracle/fmw/wlserver_10.3
  -install
  -patchlist=KPFJ
  -log=/tmp/bsu-wrapper-logs/bsu-wrapper-2014.07.13.17.41.10.log
  -log_priority=debug
Checking for conflicts...
No conflict(s) detected
Installing Patch ID: KPFJ.
Result: Success

Once the Patching Process complete's  Successfully start the Node manage and Weblogic server through wls script

ATGLITE Upgrade
Run the below command to upgrade the ATG
[orabi@biapp lib]$ /u02/app/oracle/fmw/Oracle_BI1/jdk/bin/java -jar  biappsrepositoryutil.jar upgradeATG bi.oracle.home=/u02/app/oracle/fmw/Oracle_BI1/ work.dir=/home/orabi/Patch/log biacomp.user=BIAPPS_BIACOMP  biacomp.password=OMsys123 db.conn.sid.url=<hostname>:1521:<SID> atg.db.seed.url=<hostname>:1521/<service_name> db.sys.user=SYS db.sys.password=<passowrd>

Jul 13 2014 19:58:07 INFO : Connecting to database: user:SYS as sysdba, connectString:jdbc:oracle:thin:SYS as sysdba/*****@<hostname>:1521:biapp
Jul 13 2014 19:58:07 INFO : Finished   ATGSeedDataUpgradeTask execution.
Jul 13 2014 19:58:07 INFO : Completed upgrade task: ATGSeedDataUpgradeTask
Jul 13 2014 19:58:07 INFO : Completed  upgrade command execution for component -ATG
Jul 13 2014 19:58:07 INFO : Completed component upgrade - ATG

UPGRADING FSM

 /u02/app/oracle/fmw/Oracle_BI1/jdk/bin/java -jar  biappsrepositoryutil.jar upgradeFSM bi.oracle.home=/u02/app/oracle/fmw/Oracle_BI1/ work.dir=/home/orabi/Patch/log biacomp.user=BIAPPS_BIACOMP  biacomp.password=OMsys123 db.conn.sid.url=<host_name>:1521:biapp fsm.db.seed.url=<host_name>:1521/<service_name>  db.sys.user=SYS db.sys.password=OMsys123


Jul 13 2014 20:18:19 INFO : Calling JDBCEngine constructor
Jul 13 2014 20:18:19 INFO : Connecting to database: user:SYS as sysdba, connectString:jdbc:oracle:thin:SYS as sysdba/*****@192.168.4.120:1521:biapp
Jul 13 2014 20:18:19 INFO : Finished   FSMSeedDataUpgradeTask execution.
Jul 13 2014 20:18:19 INFO : Completed upgrade task: FSMSeedDataUpgradeTask
Jul 13 2014 20:18:19 INFO : Completed  upgrade command execution for component -FSM
Jul 13 2014 20:18:19 INFO : Completed component upgrade - FSM


Saturday, July 12, 2014

RCU for BIAPPS and ODI


BI APPS 11.8 Installation[CREATING RCU for ODI and BIAPP]part -3

In this Part 3 of Bi Apps Installation we will  have the Practice of Installing the RCU for BI APPS and ODI
for Running the Rcu we need to download the  software and unzip in the database server temp folder 
 
CREATING RCU FOR BIAPPS

Step 1
Navigate to the /home/oracle/rcu/bin-- rcu is the staging directory where we unzip the V44918-01.zip 
run ./rcu to invoke the installer 


Step 2
Click create Button to create the RCU for BIAPPS

Step 3
Provide the data warehouse database details 
Host name      :=data warehouse database host name
Port               :=  Database Port
ServiceName  :=Data warehouse database service Name
Username       :=SYS
Password       :=Password of SYS user


Once the Prerequisite check completes fine then click ok and proceed to next step

Step 3
Create the Prefix as BIAPPS
and select the Oracle Business Analytic Warehouse-- it will create only the BI apps repository and we will create the ODI repository later

Step 4 

Provide the password for the BIAPPS schema user

Step 5
we need to provide the dump file location .. there are three dump file available and two of  ODI and one for BIAPPS

[oracle@biapp schema]$ pwd
/home/oracle/rcu/rcu/integration/biapps/schema
[oracle@biapp schema]$ ls
-rwxrwxr-x. 1 oracle oinstall 379461632 Apr 18 18:43 obia_comp.dmp
-rwxrwxr-x. 1 oracle oinstall 125952000 Apr 18 18:43 obia.dmp
-rwxrwxr-x. 1 oracle oinstall 857681920 Apr 18 18:42 obia_odi.dmp
-rwxrwxr-x. 1 oracle oinstall                70 Apr18 18:43 dmplabel.txt
[oracle@biapp schema]$
if you are installing the BI rcu from the different server then we need to keep this three files in the DW database server tmp directory and we need to mention the location in the value column


Step 6

Check the table space the will be create for the new schema

Increase the size of the  table space according to the requirement


Step 7
Check the summary and proceed with the installation of RCU

Step 8
Check the summary and click finish for complete the RCU

CREATING RCU FOR ODI

Step 1

Run the ./rcu from the /home/oracle/rcu/bin  /home/oracle/ruc is the staging directory where the ruc software had been unzipped 

Step 2
Click create to create the new RCU


Step 3
Host name    Data Warehouse  database host name
Port              Database port
Service         Database Port
User Name  SYS
Password    OMsys123
check ok after the prerequisite check's had been completed successfully

Step 4
Create the prefix for the ODI Scheme's
select the components show in screen  to create the ODI schema

Step 5
[oracle@biapp schema]$ pwd
/home/oracle/rcu/rcu/integration/biapps/schema
[oracle@biapp schema]$ ls
-rwxrwxr-x. 1 oracle oinstall 379461632 Apr 18 18:43 obia_comp.dmp
-rwxrwxr-x. 1 oracle oinstall 125952000 Apr 18 18:43 obia.dmp
-rwxrwxr-x. 1 oracle oinstall 857681920 Apr 18 18:42 obia_odi.dmp
-rwxrwxr-x. 1 oracle oinstall                70 Apr18 18:43 dmplabel.txt
[oracle@biapp schema]$
provide the path in the value

Step 6


Step 7
Check the summary 


Step by Step Installation Of OBIEE 11.1.1.7


BIAPPS 11.8  installation[installing OBIEE 11.1.1.7]

INSTALL AND CONFIGURE OBIEE [11.1.1.7.0] 

Bi apps installation Part 2 In the first part we had installed the data ware house database and ruc for the OBIEE in this second part we need install and  configure the OBIEE 11.1.1.7 

Step 1
Unzip the OBEE11g software's and create the staging directory for installation
   V37449-01_2of2.zip
   V37450-01_2of2.zip
   V37449-01_1of2.zip
   V37450-01_1of2.zip
   V37451-01.zip
once you unzip all the software Binaries it will create the  bishiphome[staging directory  of the bi binaries]
Start the Bi installer by using the runInstaller in the bishiphome

Step 2


Step 3
Choose the Enterprise Install  [install the binaries and configure the domain for BI]
If we choose the software Only install then we need to run the config.sh command after the software installation completes for configuring the weblogic Domain for BI

Step 4

Check all the Prerequisite check's  had been passed correctly if any of them fails then fix the particular issue and retry the failed prerequisite

Step 5
Provide the Weblogic  details for the New BI Domain
username     :weblogic_superuser
Password:   super user password for the weblogic
Domain       :Provide the Domain Name for the Bi [default bi foundation_domain]


Step 6
Provide the installation location and the directory structure for the different artifacts of the BI
Oracle Middle ware Home Location   :[The Location of the oracle middle ware home]
Oracle Home Directory                       Oracle_BI1[The Bi oracle Home directory  which will be inside the middle ware home] we need to Specify the directory name of the oracle home no need to specify the full path
Weblogic_server_Directory             :Middle ware_home/wlserver_10.3[oralce weblogic server binaries will be installed in this location]
Domain Home Location                  :Middle ware Home/user_projects/domain_name[The BI DOmain components will be installed in this location ]
Oracle Instance Location                 :Middle ware_home/instances[all the services which are c artifacts  [opmn controlled process rather in the weblogic are installed in this location] once you specify the instance name then all the binaries for the instance will be under the location mw_home/instances/<instance_name>
Instance_name                               :Name of the instance [this instance will be create under the mw_home/instances

Step 7
Select the Necessary components For the BI in the new edition Essbase suite had been introduced

Step 8
Provide the Details of the Data ware house database where the BI RCU had  been run
Connect String         :database_hostname:db:port:db_service_name
BIPlatform schemaa_Username :DEV_BIPLATFORM[when we are creating the rcu it will create user as prefix_BIPLATFORM[prefix is which we mentioned in the rcu creation stage for prefixing the user schema's]
BIPlatform_schema_password:   password for the DEV_BIPLATFORM schema

Step 9 
Provide the MDS[metadata service] schema details
Connect String  :db_hostname:dbport:dbservice_name
MDS_schema_Username  :DEV_MDS[prefix may change according to the prefix given during the ruc] we need to provide the schema name Ending with MDS
MDS_schema_password :Password for the MDS schema

Step 10
Specify the list of Port's which will be used by the BI ..
when you select the Auto port then it will install with the default Ports
when you want to used the custom ports for the bi components then create the file staticports.ini [sample staticports.init fill is located in
[orabi@biapp Response]$ pwd
/home/orabi/bishiphome/Disk1/stage/Response
[orabi@biapp Response]$ cat staticports.ini
# Note that if ports are not defined in this file they will be autoallocated starting at port 9500
# It is recommended that ports 9500-9520 are left unassigned for this auto-allocation
[WEBLOGIC]
#The Domain port no. This is the listen port of Weblogic Adminserver for the domain.
#Domain Port No = 7001
#The "content" port for the BIEE apps. This is the Weblogic Managed Server port on which BIEE applications are deployed.
#Oracle WLS BIEE Managed Server Port No = 9704
#The SSL port for the Weblogic Managed Server
#Oracle WLS BIEE Managed Server SSL Port No = 9804
#The Weblogic node manager port
#Node Manager Port No = 9556
[OPMN]
#Process Manager Local port no
#Oracle Process Manager Local Port No = 6700
#Process Manager Remote port no
#Oracle Process Manager Remote Port No = 6701
#Process Manager Request port no
#Oracle Process Manager Request Port No = 6702
[BIFOUNDATION]
#The listen port for OracleBIServer component
#Oracle BI Server Port No = 9703
#The monitor port for OracleBIServer component
#Oracle BI Server Monitor Port No = 9701
#The listen port for OracleBIPresentationServices component
#Oracle BI Presentation Services Port No = 9710
#The listen port for OracleBIScheduler component
#Oracle BI Scheduler Port No = 9705
#The monitor port for OracleBIScheduler component
#Oracle BI Scheduler Monitor Port No = 9708
#The script RPC port for OracleBIScheduler component
#Oracle BI Scheduler Script RPC Port No = 9707
#The listen port for OracleBIClusterController component
#Oracle BI ClusterController Port No = 9706
#The monitor port for OracleBIClusterController component
#Oracle BI ClusterController Monitor Port No = 9700
#The listen port for OracleBIJavaHost component
#Oracle BI JavaHost Port No = 9810
[ESSBASE]
#The listen port for Essbase Agent
#Essbase Agent Port No = 1423
#The listen port for Essbase Studio
#Essbase Studio Port No = 5300
You can Change the Ports in the file and Specify the custom ports but when you provide the custom ports provide a port series for each component[in default port allocation 9000 is used for BIfoundation Domain,opmn componets has 6000 serious port number's]  

Step 11
Metalink Support details
Step 12
check the summary before start the installation

Step 13
Start the installation Process

Step 14
After the installation Process Completed the configuration process will stat  and competes the configuration of all the components 

Step 15
Save the Configuration File nd click finish to finish the installaton

Check the weblogic console and opmn process once the instillation is completed all the process will be up and running

 [orabi@biapp bin]$ pwd
/u02/app/oracle/fmw/instances/instance1/bin
[orabi@biapp bin]$ ./opmnctl status -l
Processes in Instance: instance1
---------------------------------+--------------------+---------+----------+------------+----------+-----------+------
ias-component                    | process-type       |     pid | status   |        uid |  memused |    uptime | ports
---------------------------------+--------------------+---------+----------+------------+----------+-----------+------
essbasestudio1                   | EssbaseStudio      |   23772 | Alive    | 1960332751 |  6123440 |   6:38:46 | N/A
essbaseserver1                   | Essbase            |   23711 | Alive    | 1960332750 |  3690748 |   6:39:05 | N/A
coreapplication_obiccs1          | OracleBIClusterCo~ |   23430 | Alive    | 1960332745 |  1513436 |   6:39:30 | N/A
coreapplication_obisch1          | OracleBIScheduler~ |   23670 | Alive    | 1960332749 |  1951504 |   6:39:11 | N/A
coreapplication_obijh1           | OracleBIJavaHostC~ |   23630 | Alive    | 1960332748 |  4208388 |   6:39:15 | javahost:9810
coreapplication_obips1           | OracleBIPresentat~ |   23571 | Alive    | 1960332747 |  5336092 |   6:39:22 | N/A
coreapplication_obis1            | OracleBIServerCom~ |   23460 | Alive    | 1960332746 |  7783136 |   6:39:29 | N/A

Once the BI instillation Completes we Need to upgrade the weblogic 10.5 to 10.6 as we need to install the ODI .. In the same weblogic Domain
We need to Extend the web logic Domain for installing the ODI as ODI is compatible with the 10.6 version we need to upgrade to 10.6

UPGRADE WEBLOGIC 10.5 TO 10.6


Step 1
Stop all the service's running in the Domain .. opmnctl and weblogic managed and admin server
Download the Patch Patch 13529623: PLACEHOLDER BUG FOR WEBLOGIC SERVER 11GR1 (10.3.6) UPGRADE INSTALLER
and extract the patch to get get the wls installer which will upgrade the 10.5 to 10.6

Use the java from the BI home  and execute the jar installer

Step 2
click next to proceed to the next step

Step 3
Select the use existing middle ware home [this is the mw_home which is going to be upgraded]

Step 4
Metalink details

Step 5
Choose the product components which is need to be upgraded [in our env we need to upgrade all the products so  leave as the default one]

Step 6
Make sure about the  wls_home which is going to be upgraded

Step 7
Click Done to finish the instalaltin 

Note:= check the part three for creating the RCU for ODI and BIAPPS